Thursday 30 January 2014

Finished Betty Character Assets

This afternoon I completed all the assets and blend shapes required to fully rig Betty so she can be used for every shot in my film. This has taken me longer than anticipated to finish but I am very happy with the results. One of the reasons this has taken me longer than I had hoped was because I had to go through every shot of my animatic and deconstruct the animation and changes between emotions so every tiny detail was covered and illustrated just how I want it.

THE COSTUMES

Here are the costume changes she makes throughout my film:


"Vanilla Betty"


"Coat Betty"


"Service Rush Montage Pt. 1"


"Service Rush Montage Pt. 2"


"Service Rush Montage Pt. 3"


"Party Betty"

THE EYES

The eyes were the most tedious asset to get right because all her character is shown through her eyes, especially in the close up shots. I made three copies of the eyelid shapes - one that includes both upper and lower eyelid, one with just the upper eye lid and the other with just a lower eye lid. This is because I can give her a wider range of emotions which will hopefully add to the emotion I want the audience to get from the character on screen.

Here are all the eye blend shapes including eyelashes and custom eye shapes:


Custom Eye Shapes:


Yawn


Really Happy


Dollar Signs


Tired

THE MOUTH

The mouth shapes were quite difficult to get right and these may change a little later on. Again, because of the link between Illustrator and After Effects and the way I've set up the layers in my documents, I can tweak anything that doesn't look 100% right on screen later on.


Smile


Open Mouth 1


Open  Mouth 3


Big Smile


Sad


Sad 2


Shocked


Worried


Yawn

OTHER ASSETS

The eyebrows are on their own layer so they can be animated separately too. They will move up and down only in the Y axis to emphasise some of the eyes opening, especially for shots where Betty is shocked or surprised.

The pupils are also on their own layer so they can be animated separately too. I will pre-comp the eye shapes and apply an Alpha Matt channel to the eye layer so the pupils won't be able to go past the edge of the eye shape (the white circle) and create a slightly more realistic feel which will also allow me to utilise the eyes a lot.

For the shots where Betty doesn't blink i.e. really short shots, I have included "T" position eyelashes (the ones seen in the costume photos above)

The cheeks or dimples, if you will, will be on their own layer too so they can be turned on or off depending on the mouth shape needed in a particular shot. This will be controlled through the Opacity.

The blush layer is also separate so this can be tuned on or off depending on the shot and/or general aesthetic of the shot, again using the Opacity.

The ear rings can also be animated on their own. For fast movements, these can produce nice follow through and will emphasise her movements more. I will adjust the anchor point so they can rotate round the ear a little.

I have included two nose layers - SR_NosePoint and SL_NosePoint, so when the character is in 3D space and she turns quickly, I can turn the opacities of the noses on and off between frames depending on the angle and how much she turns 

The hat will also be animatable too. I will adjust the default anchor point so it can wave left and right a little to create some follow through when the character moves quickly and settles into a new pose.

The apron will have a mask effect on it so when she retrieves something from her apron, her hand will be able to go inside and I will then import a certain prop into that comp and parent it to her hand shape.

The roller skates (+ wheels) -

for 3d space

The legs -

IK using the PuppetTool 3 plug in 

The arms -

Also use IK 

Back view -

for when she turns round (two shots)

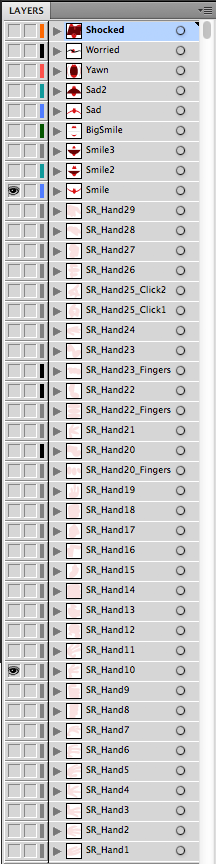
Here are screenshots of the layer set up in my Illustrator file


Tuesday 28 January 2014

More After Effects Character Rigging Research

A couple weeks ago when I began researching character rigging in After Effects, I came across multiple tutorials and example files that I have followed and looked at to see how the artist has put them together. My first attempt at character rigging was the Digital Tutors example I did a post about last week.

Since then I've found more tutorials and blogs relating to the subject and I've enjoyed reading and researching the different methods.

Over the weekend I found a royalty free plug in which simplifies the process of setting up expressions and parenting for a simple IK character rig. It is from a site called Duduf.R&D who create and develop free plug ins for character animation. Below is the link to their website.

Duik After Effects IK Tools Link

I was greatly interested in the Duik IK plug in and attempted to install the plug in this morning but unfortunately I couldn't get it to work. I read the install instructions several times and researched forums relating to the plug in but nothing I could do would work. I did find the forum linked below on Creative Cow relating to the compatibility of the different versions with versions of After Effects which outlined the problem straight away - my CS5 edition of Ae doesn't work with the latest English versions of the script.

Creative Cow Forum on Duik IK Tool Help

This led me to do more research into creating IK rigs for characters in After Effects. I did find an interesting article on Inverse Kinematics Redux, below is the link.

Post on Motionscript.com for designing IK rigs using expressions

Due to the time constraints I have left for production on my film, I decided that I don't have time to look further into and develop my own IK expressions for both of my characters so I looked further for other plug ins as a means of reducing the time spent on rigging my characters.

I found this plug in which is solely for IK rigging which is great for my characters. It also allows me extra control over other aspects like Master Nulls which is useful for the rig to work properly.

aescripts and aeplugins Puppet Tools Plug In Link

I also found an interesting website on After Effects expressions by Dan Ebbert

Motionscript.com link

Sunday 26 January 2014

Layout Creation and Set Up


Today I finished the first panoramic layout which will be set up in 3D space in After Effects, Diner_East.

I am happy the majority of my layout is done now, as this layout will be used for about a third of my shots.


I spoke to Hilary before the holiday break and she recommended I jumped between creating the assets in Illustrator and setting up the scenes in After Effects as well as animation so I don't get bored and lose focus on what I am doing. I have been following Hilary's advice since we spoke about it and I am finding the workflow easy to follow and am enjoying the project more.

I'm happy with how this layout looks so far but remembering how things can look completely different in 3D space (when I was setting up the first shot in 3D space compared to the concept art in 2D), and setting up the layers properly, I can go back and edit the props to my hearts content later on so they look as good as possible and have a nice appeal to them when the camera moves around the scene slightly.

I am also constantly going back to my research on the animation design style as inspiration for my film - UPA.

UPDATE

I'ce been setting up the layout in After Effects and seeing how it looks through a simple camera pan. I am happy with the progress I am making with this and will be retiring to this throughout the character creation phase.

Set up in After Effects


WIP Camera Pan

Thursday 23 January 2014

Character Creation and After Effects Rigging - Blend Shapes

For the past week and a bit, I have been deciding on the blend shapes for the facial features and hands for Betty. I haven't been concentrating on William because his design is much simpler and also he is the secondary character and requires less animating. After finishing the practice rigging for the monster character from Digital Tutors earlier this week, I realised just what I can do with my own characters. 


The Eyes

The eyes are the most simplest of the facial features to animate with a 2D rig because I can use Time Remapping to set the blend shapes to appear at different rotation values for a Null Object in After Effects. 


The Mouth

The mouth will be rigged in a similar way to the eyes. 


The Hands

The hands are the most difficult part to sort out. Because all of the characters actions are accompanied by expressive hand shapes, I've had to be careful in the design of each hand shape so the audience have time to read what each hand is doing in every shot. 

My next task is to take these into Illustrator and continue organising the file so it is ready for rigging in After Effects. I hope to start rigging later today and for both characters to be fully rigged in one week's time so I can start animating at the beginning of February.

The Apron

For the shots where Betty retrieves props from her apron, I have created a masking effect with the Apron asset in Illustrator. I have layered them so when her hands go towards the pocket, they'll 'disappear' and she will retrieve a prop from her apron that way. I have shown this with a quick test in Illustrator. The purple star named [Object] will be the prop. Before I import the character into After Effects to rig, I will have to put eat of these assets shown below under 'Uniform_Clean' in their own layer. This is so they can be selected individually and set up properly.


Sunday 19 January 2014

Character Creation - 3D Space

For the shots we see in which the characters have our back to us (either partially or in full), I have to illustrate these views as well as the front views. Instead of setting up and rigging two versions of the same character where we see a front view and a back view separately, I have decided to illustrate both views in the same file and parent the back plane to the front plane in After Effects so they can be animated at the same time.

Here is a simple test to show what I mean